Keyed Bugle Project
|
Keyed Bugle Project |
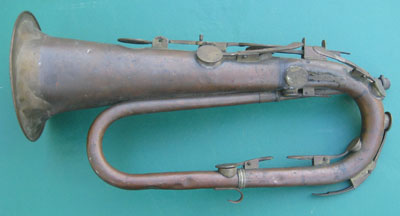
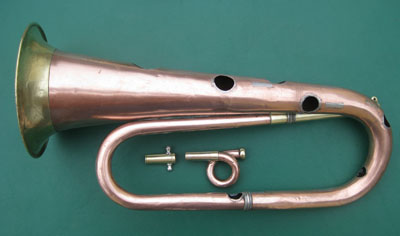
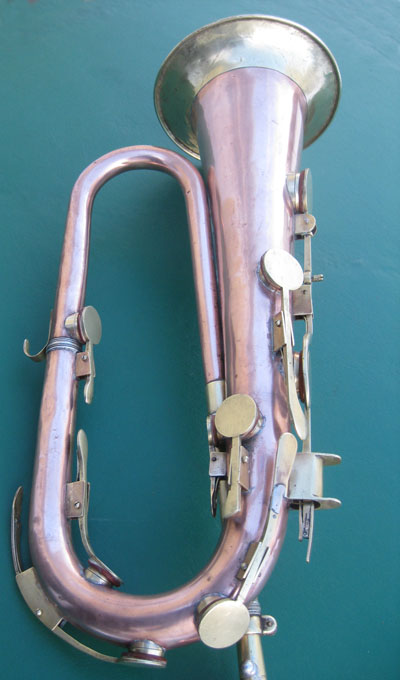
Most of what I have learned has come from Ralph Dudgeon's great book "The Keyed Bugle, 2nd Edition" and available through Amazon. Key points that match this to the Markneukirchen area of Germany are the banding at the joints, the square box with ears over the third key, and the "flamingo" shape of the fourth key. Other keyed bugles by Glier have the same square box and joints but different hole covers. Another possible maker is Wilhelm Petzold but I have not found any photos of his work to compare this with.
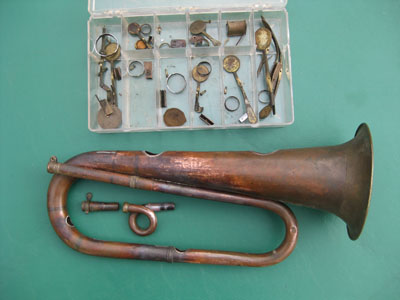
Missing from this photo is the pig tail crook that came with it and the chimney for the first hole which was loose. The tuning bit has one ear broken off and it is stuck into the lead pipe with some paper. The tapered end of the pig tail is broken off and stuck in the end of the tuning bit. I have yet to take anything apart. Only one hole cover has a pad which is probably leather. The long key on the back bow is starting to split and it looks like it was made from two pieces and pinned together. The key under the box saddle has a broken spring. Some chimneys look leaky and others have some crude solder work from old repairs so they will all have to be removed.
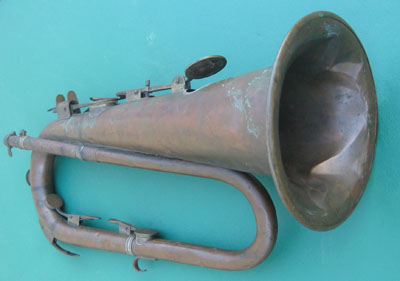
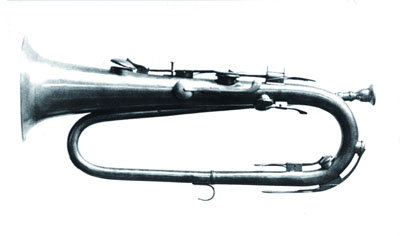
The next photo shows an identical bugle that I came across that belongs to the Chestnut Brass Company and will be a great source of information for the restoration.
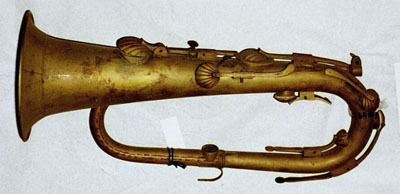
The next photo shows one bugle by Glier that's on the MIMO website in Leipzig. The box saddle, finger ring, section joint, and overall shape match well but the hole covers are domed.
This is another Glier bugle from the same website and shows even fancier hole covers. The clamp on the inlet end looks the same as mine.
The next photo is the best match yet. This one is marked "Klemm & Bro. Philadelphia" c. 1835 in Bb with six keys. These were imported from Markneukirchen where the Klemms were born and may have been made by G. & A. Klemm, their relatives.
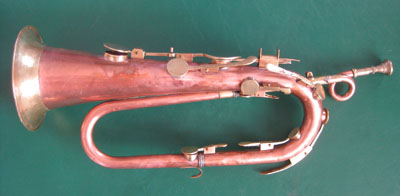
Day one of the restoration was taking off all the parts and organizing them by key. I did this only after taking photos of all the keys in place in case I have questions later. Next was carefully removing all the dents and bell wrinkles. I don't have the skill or tools to make everything look perfect again but that is not what I am after with this project. It should rather look like a well cared for original with 170 years of scratches and dings but no major problems.
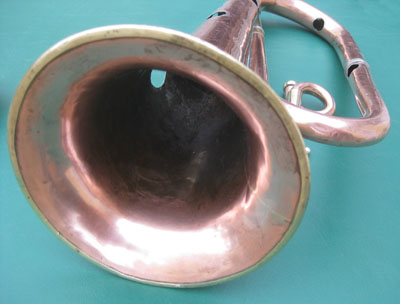
The main body from the bell back to the turn was very egg-shaped and all the boxes for the key hinges must have been hit at one time as they all had shallow dents under them.
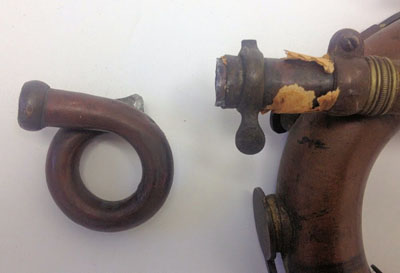
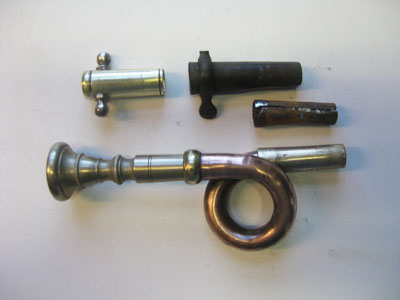
The tapered insert for the pig tail was broken off and cracked along the seam so instead of trying to use it I made a new one from an old baritone mouthpiece. The length and taper matched the old one so I cut off the end and used the lathe to make a socket for the pig tail. I then had to file out the interior so the bore matched the pig tail pipe. The tail is copper with a brass collar. The tuning bit was also in bad shape with one ear gone and cracked along the seam. It also does not appear to be the original as the seam was overlapping at the narrow end just to fit it in the receiver on the bugle. I decided to just make a new one from the parts bin using an old cornet receiver socket mated with two tuning slide knobs. It has a slight taper which matches the bugle well. I will keep the two old pieces for historical purposes as some future owner may want to repair them. The mouthpiece is an unmarked one from my stash with a deep cone cup and a taper that matches the pig tail. I just had to shorten the tapered end a little for a perfect fit. It even looks appropriate. Day two concluded with starting to polish the body using a cloth rag and Noxon polish. No machine buffing allowed for this horn. Day three was only a half day but I did get it and all the parts cleaned and polished.
I found that there were several keys with issues but nothing that was impossible to resolve. One key has a blob of solder all around the neck where the spring attaches to it. This probably broke at one time since the spring peg creates a weak spot. I elected to leave this for now since it was solid and just filed down the high spot on the top and sides to make it look better. The third key had a broken steel spring (all the others are brass) as well as an added brass bar on the back to replace a broken off end where the finger touches it. I could see a half round hole at the old break point which probably means it broke at the spring pin location. The new bar is held on with two steel pins; one of which holds the spring. I took off the broken spring and replaced it with a brass one from my parts bin then soldered it in place. I will wait until I see photos of an original key to decide about a more authentic repair. The seventh key on the back bend is very long and looks like it was made with two pieces pinned together. This was loose but still together so I carefully cleaned the joint and soldered it back together.
Here is the bell a little straighter and ready to play again. I found out that there is an iron wire inside the rim bead when a magnet attached to it. Now it's on to putting things back together! The next Saturday afternoon was spent soldering everything back on then installing all the keys to see how it all fit back together.
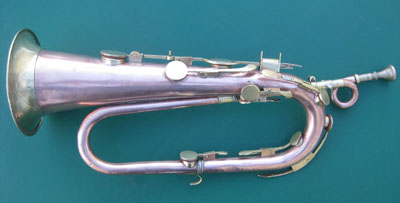
A few adjustments were needed as two of the keys did not line up perfectly. Not sure how this is since I put them exactly on the old marks but not too much work involved. The final Saturday afternoon was fitting all the pads and giving it a final polish. I read that for better performance I should use modern sax pads so I bought some good quality ones which worked well in the end but they needed modification. This bugle was designed for thin leather pads and the new ones were twice as thick as needed. I ended up slicing the new pads then re-glueing the leather back on the felt backing which worked great. With a little tweaking of the keys to get the pad flat when closed, all was finished!
About 18 hours all told for this job. The only thing I might add are cork bumpers for the keys but I will wait until I start playing it to decide. It does make a good sound and doesn't seem to leak but I will wait a few days for the glue to dry to test it out. The other thing will be to fix that key under the bridge with the broken end but for now it will play. And then, of course, I have to make or find an old case to fit this. I could use a flugelhorn case but would rather use an antique wood box that I can modify for this. |
|